
No knead gluten free bread offers a simple, satisfying way to bake fresh bread at home without the hassle of kneading or dealing with complicated dough. With the right mix of gluten-free flours, binders, and hydration, you can create a crusty, golden loaf that’s soft on the inside and full of flavor. This article breaks down everything you need—from essential ingredients and techniques to common issues and solutions. Whether you’re new to gluten-free baking or looking to improve your results, this guide will show you how to make delicious bread using a hands-off method that actually works.
Table of Contents
What Makes No Knead Gluten Free Bread So Different?
Why gluten free dough behaves differently
No knead gluten free bread starts with a different kind of dough. Unlike traditional bread, it doesn’t rely on gluten to trap air and create stretch. Gluten gives wheat dough its strength, but in gluten-free recipes, there’s no elasticity to build. Instead, you need binders like psyllium husk, xanthan gum, or chia seeds to hold things together.
The dough for no knead gluten free bread is much wetter than regular dough. It often looks more like thick batter. That’s not a mistake—it’s part of what makes this method work. When you allow enough hydration and time, the structure forms without needing to knead.
This concept appears in recipes like cheddar mochi bread, where starches and binders create chewy texture with no gluten development. Another great example is sweet potato bread, which uses moisture and starch to produce a soft, stable loaf.
No knead method: Why it actually works
The no knead technique fits naturally with gluten-free baking. When there’s no gluten to develop, kneading doesn’t help—it can even hurt the outcome by overworking the dough. That’s why no knead gluten free bread benefits from time instead of pressure. A longer rest period allows the flours and binders to absorb moisture, creating structure from within.
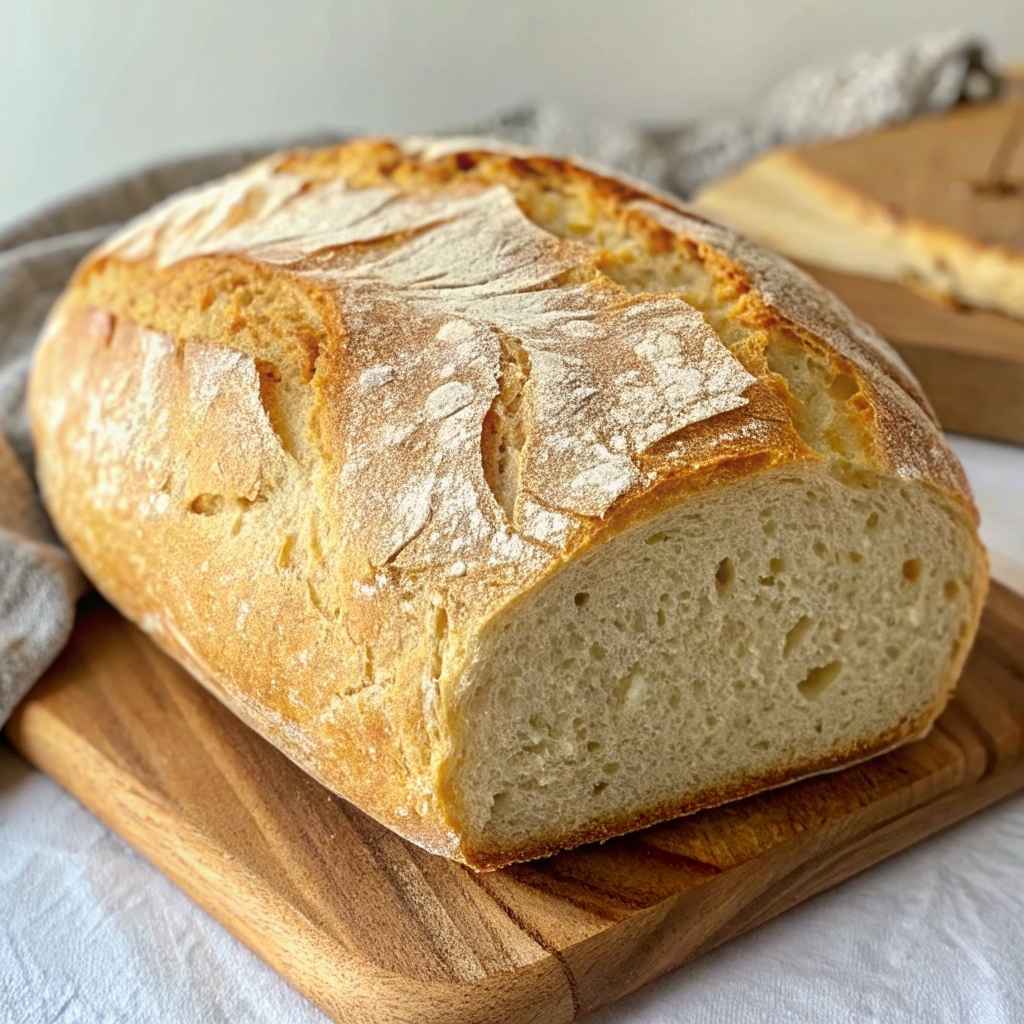
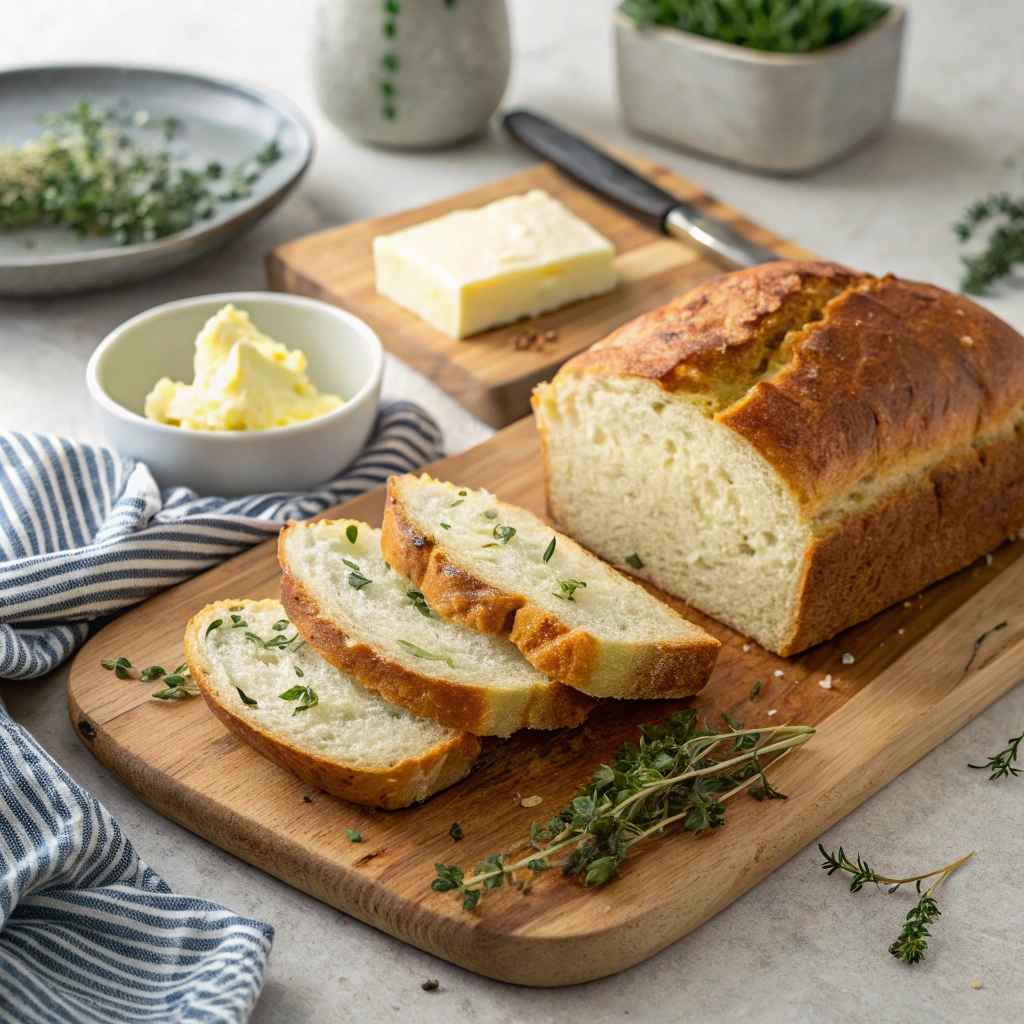
As the dough rests, it becomes thicker, more stable, and full of tiny air pockets. After baking, you’re left with a soft center and crisp crust—without the effort of kneading. The beauty of no knead gluten free bread lies in its simplicity. Mix, rest, and bake.
It’s a method that takes stress out of bread-making while giving excellent results. And with the right flours and timing, it’s just as flavorful and satisfying as traditional bread.
Key Ingredients for Perfect No Knead Gluten Free Bread
Best gluten-free flours to use
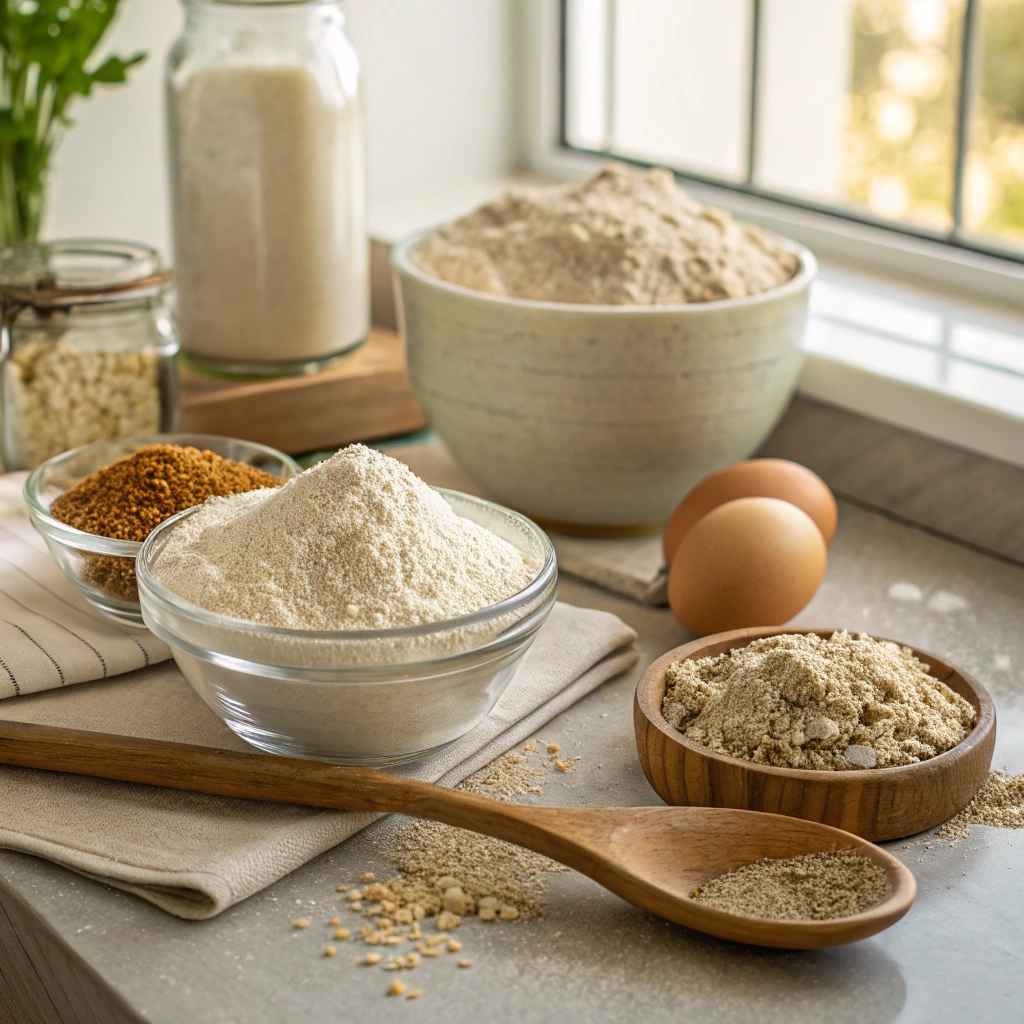
When making no knead gluten free bread, the flour blend you choose matters more than in regular baking. You can’t rely on a single flour like wheat to give structure, rise, and texture. Instead, a good mix is essential.
Start with a base flour like brown rice flour, sorghum flour, or millet flour. These provide the body and subtle flavor. Next, add a starch, such as potato starch, tapioca starch, or cornstarch. This improves softness and lightness. A high-starch content is critical for mimicking the airy crumb of traditional bread.
Many bakers prefer pre-mixed gluten-free flour blends, but check the label—some already contain binders like xanthan gum, while others don’t. If your blend doesn’t include one, you’ll need to add it separately.
For example, the soft texture in matcha pan relies on well-balanced flour and starch ratios. And in the soft and fluffy Amish white bread, wheat-based flours work together, just like gluten-free blends need to do.
The importance of binders: Psyllium husk, xanthan gum, or chia seeds
Binders are the backbone of no knead gluten free bread. Without them, your dough would collapse and bake into a dense brick. The most effective binder is psyllium husk powder. It absorbs water, forms a gel, and gives structure to the dough.
Xanthan gum is another popular binder. It helps trap air and improve elasticity. However, too much can make the texture slimy. For a natural, whole-food option, chia seeds (ground or whole) can replace gums. When mixed with water, they form a gel similar to egg or gluten structure.
Each binder performs differently. Psyllium gives a stronger rise and more flexibility during shaping. Xanthan offers smoothness but works best when paired with starches. Chia seeds offer moisture and nutrition but less lift.
Choosing the right one depends on your flour blend and desired texture. Mixing binders can also work well. For instance, using both chia seeds and psyllium creates a gel-like dough that rises and holds shape without kneading.
How to Master No Knead Gluten Free Bread at Home
How hydration levels affect gluten free dough
For no knead gluten free bread, hydration is everything. Gluten-free flours absorb liquid differently than wheat flour. Some, like coconut or almond flour, soak up water quickly. Others, like rice or sorghum, need more time. This means your dough must start out wetter than you might expect.
A typical no knead gluten free dough will be sticky, shaggy, and hard to shape. That’s normal. The higher moisture helps the binders activate and allows starches to swell, giving you a soft, tender crumb once baked. Don’t panic if it looks more like a thick batter—that’s a sign you’re on the right track.
Moisture balance also helps avoid the dreaded gummy center. When your dough is hydrated properly, steam forms inside the loaf as it bakes, creating air pockets. This gives it lift without the need to knead or stretch.
You’ll see this technique in recipes like pumpkin banana loaf, where high moisture content creates softness and density without heavy handling. Similarly, vegan banana nut blondies rely on natural moisture from fruit and starch instead of flour strength.
Tips to get airy texture without traditional kneading
Getting that light, open texture is possible without kneading—you just need the right combination of time, temperature, and ingredients. Here’s how:
- Use room temperature ingredients. Cold liquids slow down hydration and fermentation.
- Give it time. Let your dough sit for at least 4 hours, or overnight in the fridge. This resting time allows the flour to fully absorb the water.
- Don’t overmix. Stir just until everything is combined. Overworking breaks down air pockets and makes the bread dense.
- Add a bit of acid. A splash of apple cider vinegar helps improve rise and flavor.
- Bake in a hot oven. Starting your bread in a preheated Dutch oven or covered pan traps steam, helping the loaf rise during the initial phase.
Letting time replace kneading is the secret behind a successful no knead gluten free bread recipe. Once you master moisture control, you’ll consistently bake bread with a beautiful crust and airy crumb.
Step-by-Step Method to Make No Knead Gluten Free Bread
Print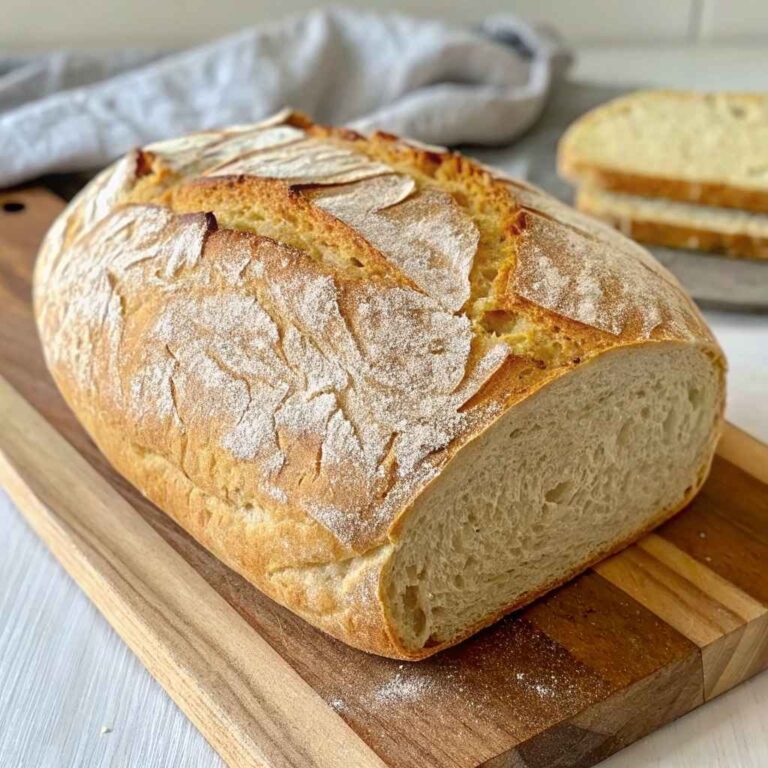
No Knead Gluten Free Bread
Soft, rustic no knead gluten free bread with a golden crust and chewy interior. No kneading or mixer required.
- Total Time: 1 hour 5 minutes
- Yield: 1 loaf 1x
Ingredients
-
2 cups gluten free flour blend
-
1 cup warm water (100°F)
-
1 tablespoon psyllium husk powder
-
1 teaspoon salt
-
1 teaspoon apple cider vinegar
-
1 teaspoon sugar
-
2 teaspoons dry yeast (or 2 tsp baking powder for no-yeast version)
Instructions
-
Mix the dry ingredients in a large bowl.
-
Add warm water and vinegar, and stir until fully combined.
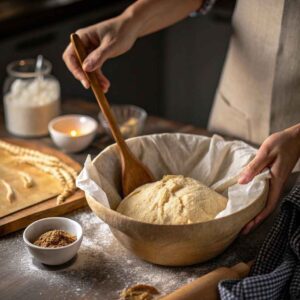
Resting dough for gluten free no knead bread -
Cover the bowl and let the dough rest at room temperature for 4–6 hours, or overnight in the refrigerator.
-
Preheat your oven to 450°F with a Dutch oven inside.
-
Transfer the dough onto parchment paper; gently shape it if needed.
-
Bake covered for 30 minutes, then uncovered for 25 minutes.
-
Remove from the oven and cool completely before slicing.
Notes
-
Do not overmix the dough.
-
Use parchment paper for easier handling.
-
Cooling fully before slicing prevents a gummy texture.
-
Slice and freeze for longer storage—toast from frozen.
- Prep Time: 10 minutes
- Cook Time: 55 minutes
- Category: Gluten Free
- Method: Baking
- Cuisine: American
- Diet: Gluten Free
Nutrition
- Serving Size: 1 slice
- Calories: 125
- Sugar: 1g
- Sodium: 210mg
- Fat: 2g
- Saturated Fat: 0.3g
- Unsaturated Fat: 1.7g
- Trans Fat: 0g
- Carbohydrates: 25g
- Fiber: 3g
- Protein: 2g
- Cholesterol: 0mg
Keywords: no knead gluten free bread, easy gluten free bread, gluten free loaf
You’ll notice this same rest-and-rise method in recipes like how to make soft and fluffy Shokupan and garlic bread rolls, both of which depend on long rest periods for better texture and rise.
Baking and cooling: Getting the crust and crumb just right
Once the dough has rested and risen, it’s time to bake. Here’s how to handle this next stage:
- Preheat your oven to 450°F (232°C). Place a Dutch oven or heavy baking dish inside as it preheats. This traps steam and creates a crisp outer crust.
- Shape the dough gently. With wet hands or a spatula, transfer the dough to parchment paper. Don’t deflate it. No shaping is necessary—just coax it into a round or oval form.
- Bake covered for 30 minutes, then uncover and bake for another 25–30 minutes to brown the crust.
- Cool completely before slicing. This step is critical. Gluten-free bread firms up as it cools. Cutting too early leads to a gummy texture.
Proper baking transforms your no knead dough into a crusty, airy loaf. When you give the dough time to rest and the oven time to steam, you get the results you want—no kneading necessary.
Common No Knead Gluten Free Bread Problems Solved
Why your dough is too wet or too dry
Getting the right consistency is one of the biggest challenges in making no knead gluten free bread. Since gluten-free flours vary widely in how much moisture they absorb, your dough might seem too sticky or overly stiff—even if you follow the recipe exactly.
Too wet?
If your dough looks like pancake batter after mixing, it may need more resting time. Give it at least 30 minutes before judging the texture. If it’s still too loose, sprinkle in 1–2 tablespoons of gluten-free flour blend and mix gently. Don’t overdo it. Overcorrecting leads to dry bread.
Too dry?
If the dough cracks or resists mixing, add warm water 1 tablespoon at a time until it softens. Some flours like coconut or chickpea absorb water fast and may need adjustments. Resting the dough after mixing can also help balance moisture levels before baking.
In flexible recipes like korean sesame mochi bread, you’ll see how doughs can be sticky but still bake beautifully. Similarly, recipes like fortune cookies from scratch rely on exact texture for consistent results.
How to prevent a gummy texture inside
One of the most common issues in gluten-free bread is a gummy or undercooked center. This usually happens for two reasons: insufficient baking time or cutting too soon after baking.
Here’s how to fix it:
- Bake longer at a lower temperature. If the crust browns too fast but the inside is raw, reduce the oven temp to 400°F and extend the baking time by 10–15 minutes.
- Use a thermometer. A fully baked gluten-free loaf should register at least 205°F in the center.
- Always cool completely. Wait 2–3 hours before slicing. During this time, the bread continues to set and firm up.
Another tip: avoid overmixing the dough. Stirring too long can break down air bubbles, resulting in a dense, sticky loaf.
When troubleshooting, remember that moisture balance, oven temperature, and cooling time all affect the final texture. Once you find the right combination for your flour blend and baking setup, no knead gluten free bread becomes easy to repeat with consistent success.
Tools and Equipment That Help (But You Don’t Need a Mixer!)
Baking pans, Dutch ovens, and alternatives
One of the great things about making no knead gluten free bread is that it doesn’t require a stand mixer or fancy kneading equipment. But using the right baking vessel can dramatically improve your results.
Dutch ovens are the gold standard. Their heavy lids trap steam, which allows your loaf to expand fully before the crust sets. That steam also creates a shiny, crisp crust—something hard to achieve with a standard baking sheet.
Cast iron pans or stoneware bakers are good alternatives if you don’t own a Dutch oven. Just cover the loaf with an inverted metal bowl or foil during the first half of baking to mimic steam trapping.
For smaller batches, even a deep loaf pan works well. You can line it with parchment and tent it with foil for the same effect.
In recipes like easy nian gao, sticky batters benefit from structured pans that hold shape—just like with gluten-free bread. And in no-bake desserts like matcha chocolate berry cheesecake, the right container plays a key role in final texture and consistency.
Tools that improve the final result without kneading
While you can make gluten-free bread with just a bowl and spoon, a few tools can make your baking easier and your results more consistent:
- Kitchen scale: For precise flour-to-liquid ratios
- Instant-read thermometer: To confirm doneness (target: 205°F internal temp)
- Parchment paper: Keeps dough from sticking and makes transfer easy
- Silicone spatula: Gentle on sticky dough without breaking air pockets
- Dough scraper or bench knife: Helps in handling and shaping wet dough
None of these are required, but they make the baking process smoother—especially when you’re working with soft, sticky dough typical in no knead gluten free bread recipes.
Simple tools + smart ingredients = reliable results. It’s that combination that turns what seems like a tricky bread into one of the easiest types to make from scratch.
Health Benefits and Nutritional Value
Is no knead gluten free bread better for digestion?
Many people choose no knead gluten free bread because it’s easier on the digestive system. By removing gluten—a protein found in wheat, barley, and rye—you eliminate the common irritant behind bloating, gas, and stomach pain in those with celiac disease or gluten sensitivity.
What’s more, the long rest time in no knead methods helps break down complex carbohydrates. This can make the bread easier to digest, even for people without gluten issues. Resting also improves taste and texture without needing added sugars or preservatives.
Some recipes include natural binders like psyllium husk or chia seeds, which also add soluble fiber. Fiber supports healthy digestion, helps regulate blood sugar, and improves satiety after eating.
Dishes like pink salt recipe for weight loss and easy clay pot chicken rice similarly highlight the importance of digestion-friendly ingredients, balancing taste with real benefits.
Understanding the nutritional profile of gluten-free ingredients
Gluten-free flours vary in their nutrition, which makes flour selection more than just a texture decision. Here’s a general idea of what common gluten-free ingredients contribute:
| Flour | Key Nutrients |
|---|---|
| Brown Rice Flour | B vitamins, magnesium, fiber |
| Sorghum Flour | Protein, antioxidants, iron |
| Tapioca Starch | Carbs, minimal fat or protein |
| Almond Flour | Healthy fats, vitamin E, protein |
Choosing your blend gives you control over both flavor and health impact. Whole grain flours bring in complex carbs and fiber, while nut flours add fats that improve satiety. When combined with natural binders and healthy oils, no knead gluten free bread becomes more than allergy-friendly—it becomes nourishing.
Serving, Storing, and Variations
How to slice and store it for maximum freshness
After baking, no knead gluten free bread should cool completely before slicing. This is more than a formality—it’s essential. Gluten-free bread firms up as it cools. Cutting too soon can cause the inside to become sticky or collapse.
Use a serrated bread knife to avoid squishing the loaf. Cut only what you’ll eat that day and store the rest properly.
For storage:
- Room temperature: Wrap in a clean kitchen towel or parchment for up to 2 days.
- Refrigerator: Use a sealed container to prevent drying. Best for up to 4–5 days.
- Freezer: Slice the loaf first, then store in a freezer-safe bag. Toast slices straight from frozen.
Avoid plastic wrap or bags at room temp, which can cause sogginess. A breathable wrap is better to keep the crust firm.
In recipes like cheddar and turkey melt on sourdough, having pre-sliced bread on hand makes meal prep faster. Pairing slices with spreads or savory fillings adds variety without extra effort.
Add-ins and flavor twists: From seeds to herbs
One of the best parts of making your own no knead gluten free bread is customizing it. Once you’ve nailed the base dough, it’s easy to change the flavor or texture with a few add-ins.
Try these mix-ins before the final rise:
- Seeds: Sunflower, pumpkin, or sesame seeds add crunch and nutrients.
- Herbs: Rosemary, thyme, or oregano give your bread a savory kick.
- Garlic or onions: Add minced pieces for extra aroma and flavor.
- Cheese: A handful of shredded cheddar or parmesan can turn it into a snack-worthy loaf.
Looking for a sweeter spin? Fold in dried fruits, cinnamon, or vanilla. These approaches echo the technique used in recipes like lemon blueberry cheesecake, where a base is adjusted with natural flavors and mix-ins.
The beauty of this recipe style is how flexible it is. Once you have the moisture, flour, and binder ratios set, the flavor possibilities are wide open.
FAQs About No Knead Gluten Free Bread
What is the trick to making good gluten free bread?
The key is moisture and structure. Use a balanced blend of gluten-free flours, a reliable binder like psyllium husk, and the right hydration level. Letting the dough rest is just as important—it allows the ingredients to absorb moisture and stabilize before baking. With no knead gluten free bread, patience replaces effort.
What is the biggest challenge of making gluten free bread?
Texture control. Without gluten, it’s easy to end up with a dense or gummy crumb. To avoid this, measure your ingredients by weight, avoid overmixing, and bake thoroughly. Cooling the loaf completely before slicing is also essential for structure.
Can you develop gluten without kneading?
No. Gluten development only occurs in wheat-based doughs through kneading or long fermentation. However, for gluten-free baking, structure is built using binders and hydration. That’s why no knead gluten free bread works—it doesn’t rely on gluten at all.
Does gluten-free flour need to be kneaded?
No, it doesn’t. Gluten-free flour lacks the proteins required to benefit from kneading. Instead of kneading, you mix and allow the dough to rest, letting binders and starches do their job. This hands-off method leads to better texture and less risk of overworking the dough.
Conclusion
No knead gluten free bread proves that baking delicious, homemade bread doesn’t need to be complicated. With the right mix of flours, a quality binder, and enough resting time, you can produce a loaf that’s golden, airy, and full of flavor—without the kneading, mixers, or special skills.
This bread method is ideal for beginners and gluten-free veterans alike. It’s forgiving, customizable, and perfect for meal prep or everyday eating. From crunchy crust to moist crumb, this style of bread is all about simplicity that works. And once you get it right, it becomes a staple you’ll bake again and again.
Want to see how others are enjoying their homemade bakes? Join our community and share your bread creations on Facebook.